CIV
Create characters, registrations, and 911 calls.
CAD / MDT user guide
Use this page as the quick field manual for configuring TrojanCAD, creating calls, assigning several units at once, managing records, and using each role module.
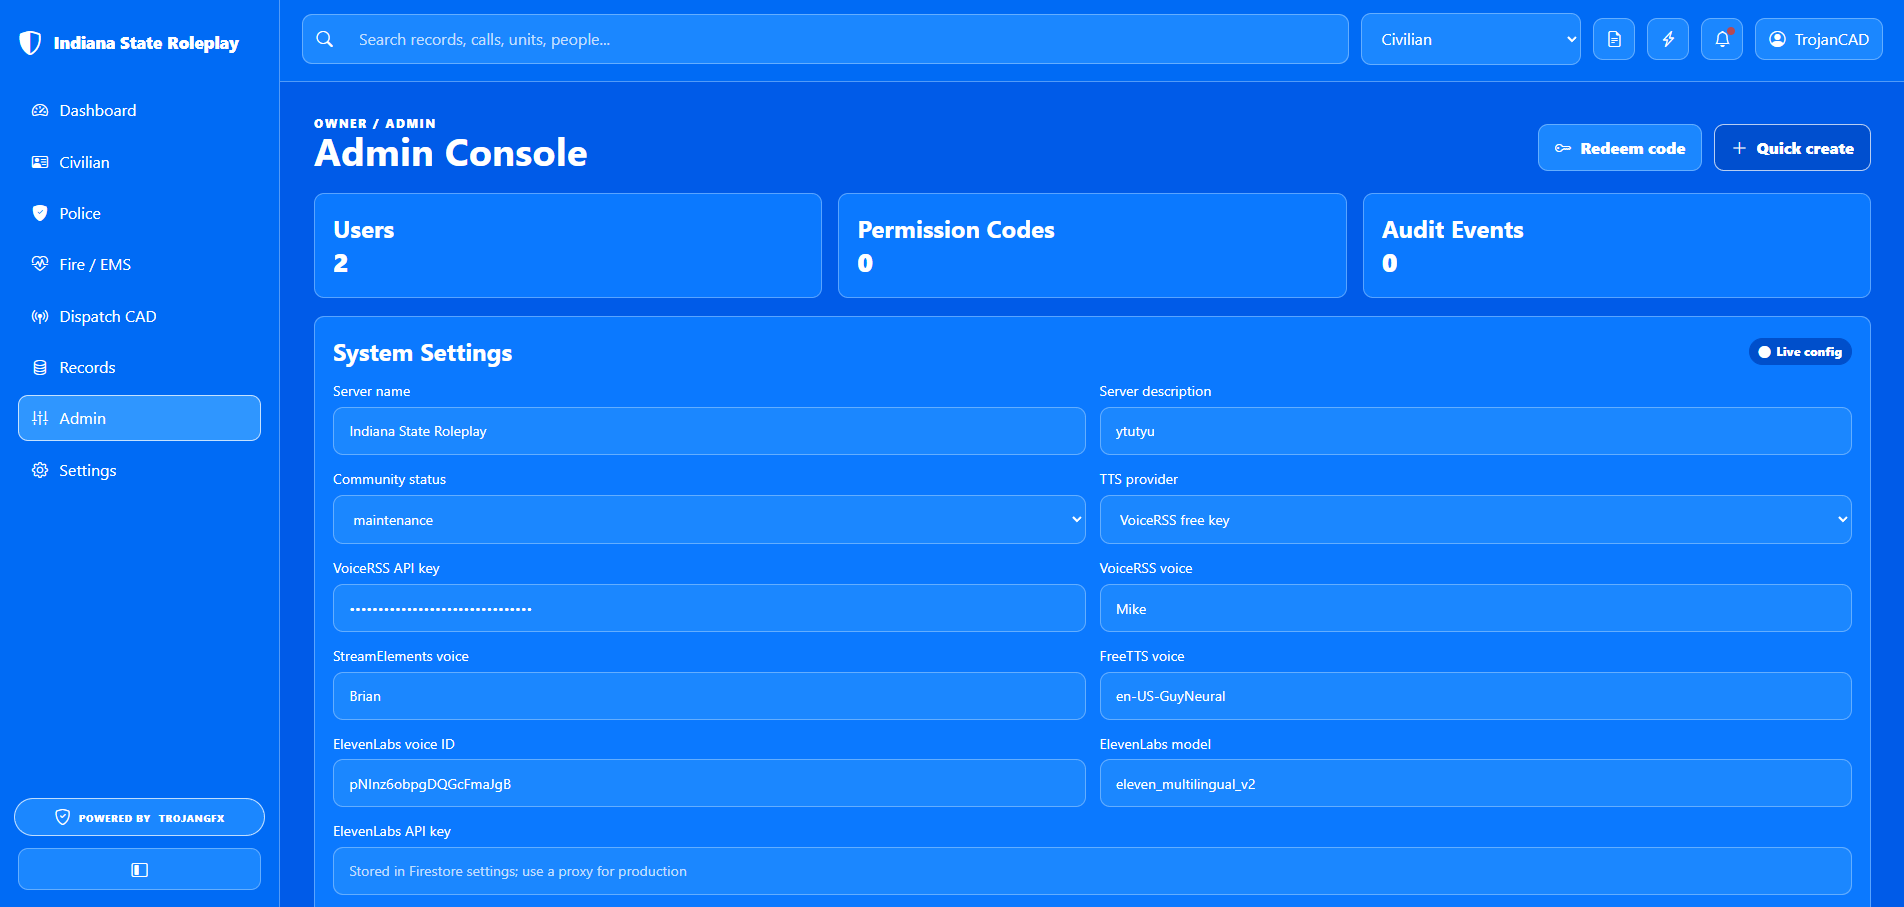
Admin workflow
Product admins use the Admin Console to control the parts of TrojanCAD that staff and civilians see: name, landing-page description, community status, TTS provider, departments, announcements, users, and permission codes.
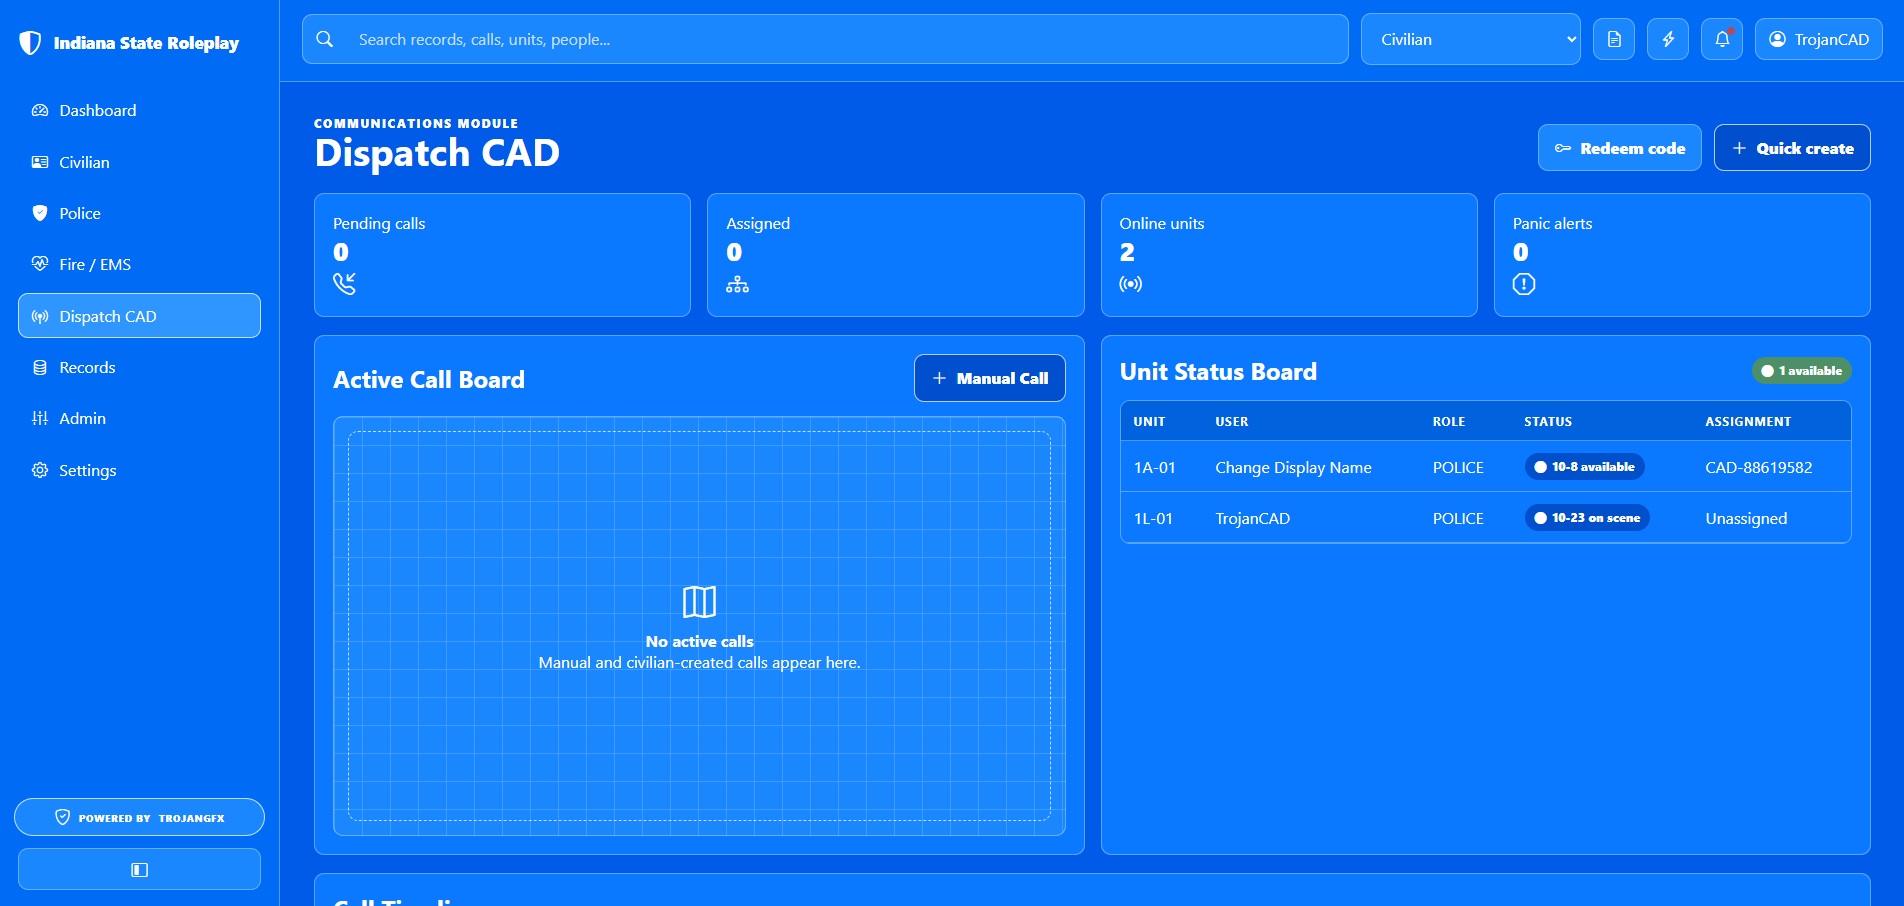
Dispatch and civilian workflow
Calls can enter the system from the Civilian Center or from Dispatch CAD. Civilian-created calls are sent as 911 calls. Dispatch-created calls are manual CAD events for staff-generated incidents.
Forms and assignments
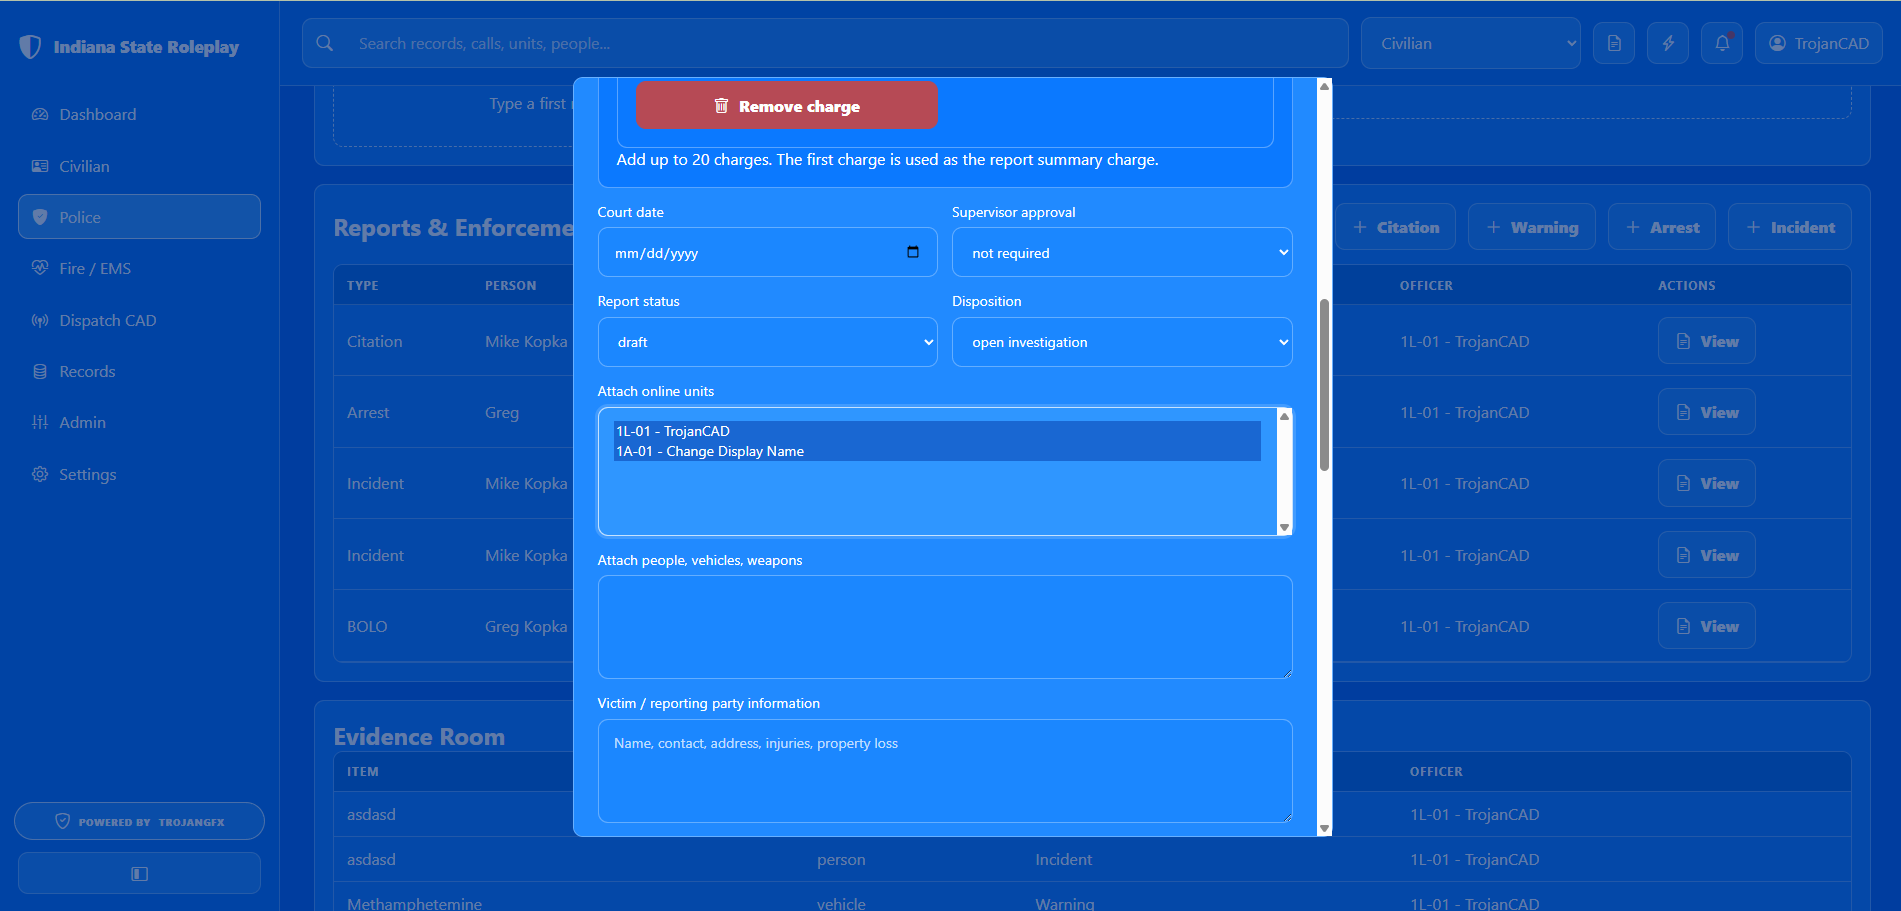
TrojanCAD uses standard browser multi-select fields for assignments and permissions. The same interaction applies to unit assignments, permission-code roles, departments, licenses, attached units, and user management.
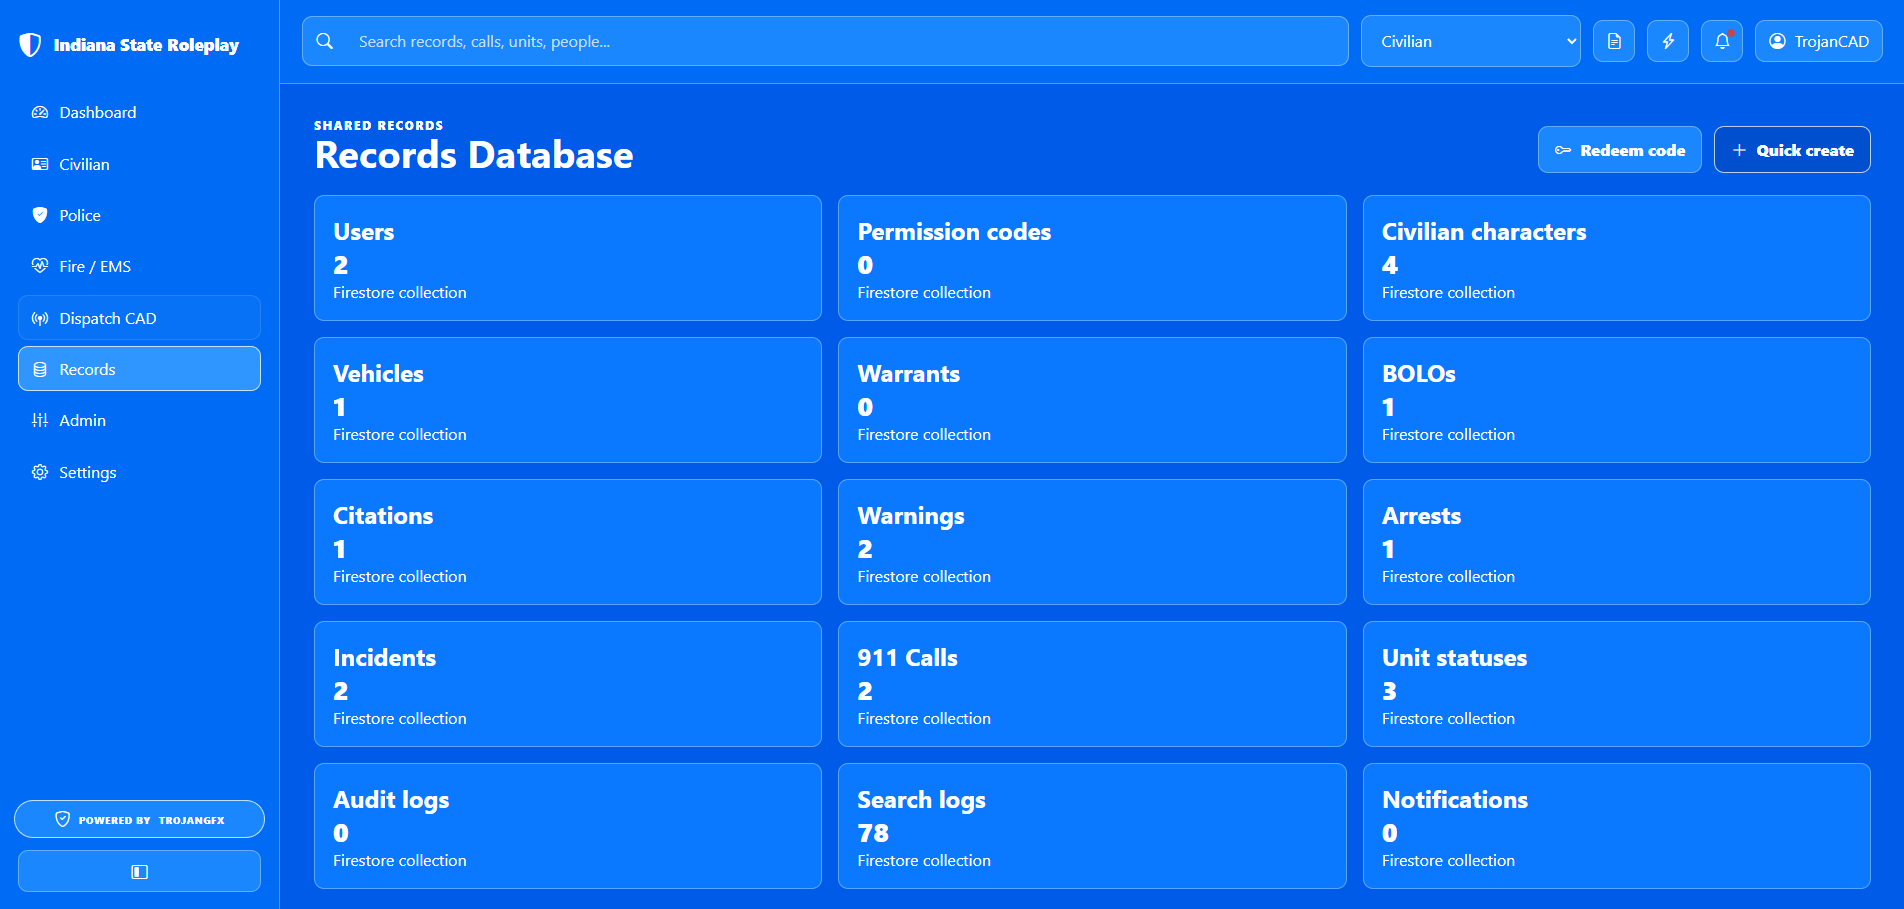
Records and app data
Most record maintenance happens inside the role modules that created the record. Use Records for a high-level view of what exists, Admin Console for users and access, Dispatch CAD for calls, Police MDT for enforcement reports, Fire / EMS for medical and incident reports, and Civilian Center for civilian-owned records.
| Record type | Where to use it | Typical action |
|---|---|---|
| Users and roles | Admin Console | Edit roles, departments, and suspension status |
| 911 and CAD calls | Civilian Center, Dispatch CAD | Create, assign, update, archive, or delete calls |
| Unit status board | Police, Fire / EMS, Dispatch CAD | Clock in, update status, and track assignments |
| Permission codes | Admin Console, profile menu | Create codes or redeem access |
| Departments | Admin Console | Add, edit, deactivate, or remove agencies |
| Announcements and alerts | Admin Console, Dispatch CAD, unit status actions | Broadcast notices, panic alerts, and call attachments |
| Reports and searches | Police MDT, Fire / EMS, Records | Create reports, review counts, and search relevant records |
Access model
Each account starts with civilian access. Admins can grant modules by editing users directly or by issuing permission codes.
Create characters, registrations, and 911 calls.
Clock in, update status, search records, and create enforcement reports.
Manage fire and EMS unit status, patient reports, and assigned calls.
Create CAD events, assign units, acknowledge panic alerts, and archive calls.
Configure the server, departments, users, codes, announcements, and TTS.
Quick procedures
Open Admin Console, choose Create code, enter the code, select roles and departments, set usage limits, then save.
Open the profile menu or page header, choose Redeem permission code, enter the code, and refresh into the new role.
Open Police MDT, choose Unit setup, select agency, enter unit number, save, then use status buttons.
Open Fire / EMS, choose Clock / Status, select station or custom agency, enter unit, and update status.
Open Dispatch CAD, manage a call, select one or more online police or fire units, add notes, then update the call.
Use the top search bar for global lookup, or use Police MDT name and vehicle lookup for report-ready results.